Obtain an Integration Code
The first step in adding a third party integration is to obtain an integration code from the third-party you are adding the integration for: Emergency Reporting Go here to fill out a form Emergency Reporting needs to generate the code for your department. They will generate the code and give it to you.
If This Then That
Setup an account at
https://ifttt.com/ ... I believe you can use their mobile apps or their website for setting up events and triggers.
After you have an account set up, select your name and choose "New Applet".
To add the “webhooks” service, select the blue "+this". Select or type in "Webhook" to find it to select.
THIS will use webhooks... give the event a name like “Active911" or any name you can remember and create trigger.
For the THAT (trigger) select the service or the method you would like to be notified.
Once this is all set up, you will need to find your key. To do so, go to My Applets > Services > Webhooks > Documentation.
Now setup the integration in our web console:
Add new integration (the one called If This Then That)
For the new integration use the following URL: “
https://maker.ifttt.com/trigger/Active911/with/key/YOUR_ID_HERE” .
For the ID, enter the key you found above in step 6.
If you want to set it up for a specific pagegroup, you can select which ones you want the alerts forwarded from. If you want all alerts to come through, leave pagegroups blank.
Now if you send an alert via SMTP/SNPP you should see an event in IFTTT and it should trigger whatever action you set up for that event.
Other
If you have a URL that you would like the alert information forwarded to, by selecting "Other" you can provide that URL and name the destination in case you want to add more than one.
Add the integration to Active911
Once you have obtained an integration code, go to the Agency tab of the web console and scroll to the bottom to find the Integrations section:

Click on the Add button to add a new third-party integration:

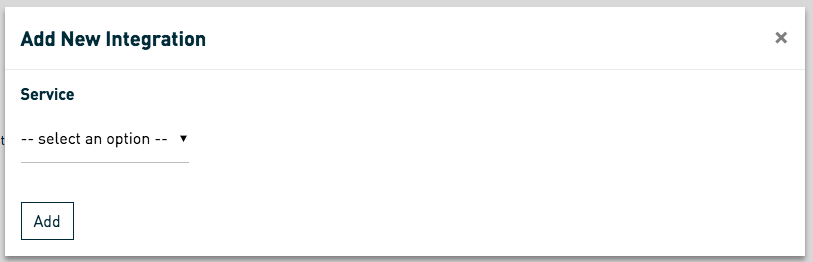
In the dialog box, select the "Service" dropdown and choose the corresponding third-party as the service, and enter your integration code in the "CAD CODE" field that will appear:
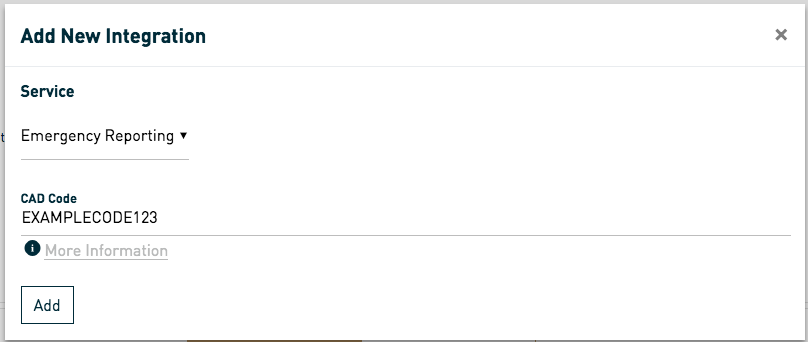

Click Add, and check the Integrations section to verify that the integration has successfully been added to your agency:
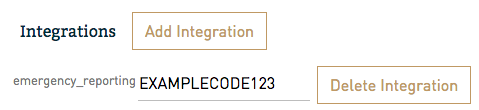
You can edit the code directly from the Agency tab by clicking on the text box containing the code, or delete it by clicking on the "X" button next to the corresponding integration to be deleted.
Emergency Reporting Options
When you are selecting to integrate with Emergency Reporting, there are two options (Emergency Reporting and Emergency Reporting (using CAD codes). If you select the original Emergency Reporting option, it will send the alert data through and enter the Active911 # as the CAD/Alert ID. If your dispatch/CAD is sending a separate CAD #, you can select the Emergency Reporting (using CAD codes) option to ensure that the alert data is imported with the CAD # as the alert ID number.
What to expect after adding the integration
Emergency Reporting
For every alert by default we are sending Narrative & Location data to ER if it is available. In your ER console, Active911 Alerts should start appearing and to verify that they match, check to see that the "Disp. #" in ER maps to the "Active911 #" in our system.
For the Narrative we send the alert timestamp and the normalized details text for the alert (Narrative Tab within ER).
For the Location we are sending Address, State, City, & CrossStreet if they are available (Basic Info Page 3 within ER).
Lastly, if we've setup the custom Run Report parsing for your agency there is a third set/type of data that we can forward on to ER if available. For Run Report Alerts we are sending apparatus names, event types, and datetimes (Basic Info page 4 within ER).